
If you’re considering a roof replacement, the installation process can seem overwhelming. With so many materials and techniques to choose from, it can be hard to know where to start. One popular and durable option is installing roof shingles. In this blog, we give you a step-by-step guide to installing roof shingles, with tips from our Torrance roofing experts.
Step 1: Preparation
Before you start installing roof shingles, there are a few key things you’ll need to do to prepare your roof. First, you’ll need to inspect your roof to make sure it’s in good condition and free from any damage. Next, you’ll need to remove any old roofing materials and make any necessary repairs. Finally, you’ll need to measure the roof and determine how many shingles you’ll need to complete the job.
Step 2: Laying the Felt
Once your roof is prepared, you’ll need to lay down a layer of felt. This is a protective layer that will help prevent any water damage to your roof deck. Start by laying the felt in a series of overlapping rows, working from the bottom of the roof up. Make sure the felt is tight and secure, and that there are no wrinkles or bubbles.
Step 3: Installing the Starter Shingles
Next, you’ll need to install the starter course of shingles. This is the first row of shingles that will run along the eaves of the roof. Make sure to measure and cut the shingles to the right length, and align them with the centerline of the roof. Make sure the shingles are straight and secure and nail them into place.
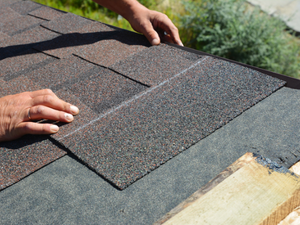
Step 4: Installing the Main Shingles
Once the starter course is installed, you can start installing the main course of shingles. Start at the bottom of the roof and work your way up, installing shingles in overlapping rows. Make sure to align the shingles with the centerline of the roof, and make sure they are tight and secure. As you work, make sure to check the shingles for any damage or defects, and replace any damaged shingles as needed.
Step 5: Finishing the Job
Finally, you’ll need to finish the job by installing ridge cap shingles. These shingles will run along the ridge of the roof, providing a finished look and protecting the roof from the elements. Make sure to measure and cut the shingles to the right length, and nail them into place.
Get Help from Our Professional Torrance Roofing Team!
With these steps, you’ll be able to install roof shingles like a pro! If you’re looking for a reliable roofer, be sure to schedule a free estimate with a trusted professional. They’ll be able to help you determine the best materials and techniques for your roof, and give you a quote for the job. Call us today at (310) 831-7663 and let us show you why we’re the best choice for all of your roofing needs in Torrance, CA!